Ten Meals for Toddlers.

Feeding a toddler is always tricky. Their taste buds change as fast as their attention spans. It’s an endless struggle, really. Whenever I feed LT a meal that doesn’t get thrown across the kitchen, I do a little victory dance. After many attempts, here are ten meals for toddlers that, in my experience, LT really enjoys. They cover all the basic food groups (I’m a stickler on this) and are great for dinners.

Toddler Meal 1:
Hamburger, Mashed Potatos, Asparagus, Peaches, String Cheese
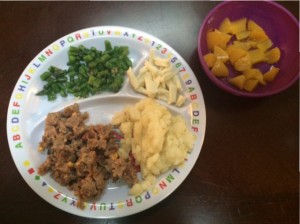
Toddler Meals

Toddler Meal 2:
Breaded Chicken, Macaroni and Cheese, Green Beans, Bananas
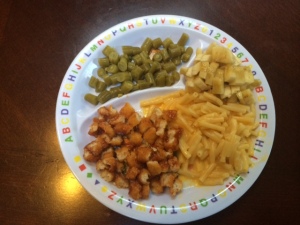
Healthy Meals For Toddlers

Toddler Meal 3:
Meatballs, Ravioli With Red Sauce, Garlic Bread, Corn, Strawberries (not pictured….LT was having a hunger meltdown before I could snap a picture)
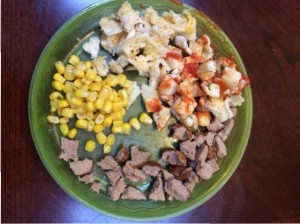
Toddler Dinner Meals

Toddler Meal 4:
Chicken Fried Rice With Peas & Carrots, Blueberries (partially pictured….see comment above in meal #3), String Cheese
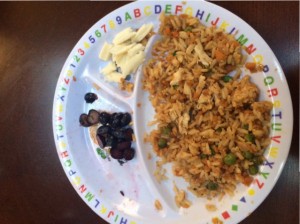
Meals For Toddlers

Toddler Meal 5:
Crock Pot Roasted Chicken, Potatoes and Carrots, Bananas, Strawberry Yogurt (not pictured)
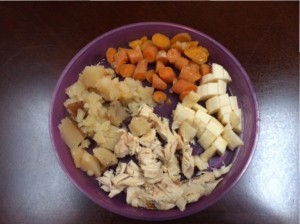
Delicious Toddler Meals

Toddler Meal 6:
Lasagna, Green Beans, Blueberries, Dinner Roll
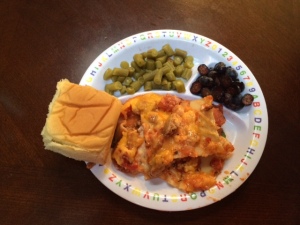
Tasty Toddler Meals

Toddler Meal 7:
Barbecue Breaded Chicken, Macaroni and Cheese, Blueberries/Bananas, Broccoli
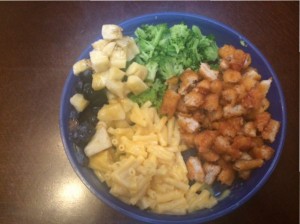
Dinner Meals For Kids

Toddler Meal 8:
Spaghetti, Meatballs, Roasted Yellow Squash, Banana, Sweet Potato Yogurt (not pictured) Garlic Bread
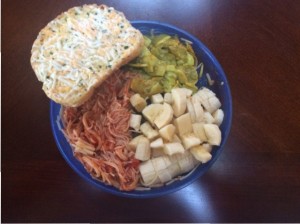
Toddler Meal

Toddler Meal 9:
Pork Tenderloin, Carrots, Macaroni and Cheese, Apple Sauce (not pictured), String Cheese
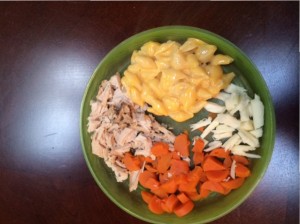
Simple Toddler Meals

Toddler Meal 10:
Chicken and Cheesy Rice, Broccoli, Bananas, Pears
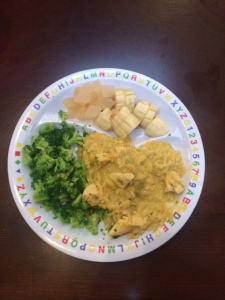
Toddler Dinners


Hope this gave you some toddler meal inspiration! I’d love to hear some meals you’ve whipped up for your little ones! Comment below and share your favorites.
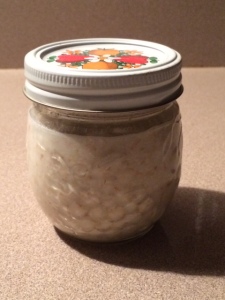
Almond Butter Oatmeal Jar.

When January first rolled around, like many do, I made a New Year’s Resolution. It wasn’t to lose weight or go to the gym more often but rather just to overall make healthier food decisions. I like to think of myself as generally a healthy eater to begin with so this resolution wasn’t completely foreign which was really great because it meant I could probably stick to it. I also really wanted to alter my sugar intake. Being that I have always eaten somewhat healthy, I have often fallen victim to the low-calorie snack packs and low fat yogurt. What I have been slowly learning is that though these foods may be low in calories, they really are not good for you at all. So, I have been trying to avoid foods with added sugars and processed foods, as well as make a conscious effort to eat more fruits and vegetables. A snack that was once a Special K bar is now cucumber and hummus. Low-fat yogurt is now Greek yogurt with a drop of honey.

One of my go-to breakfasts of late has been this whole concept of breakfast in a jar. And it’s so easy to make. You get a mason jar, add oats, milk (or soy), some protein (like peanut butter or almond butter), some fruit, stick it in the fridge overnight and you’re done. I Pinned a bunch of recipes but I didn’t have all of the ingredients needed in my home at the time I wanted to make it, so I experimented with what I had and made my own concoction. Let’s just say I am borderline obsessed.

Overnight Almond Butter Oatmeal

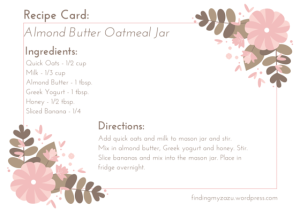
Ingredients:

  1. Quick Oats – 1/2 cup
  2. Milk (skim, soy, almond) – 1/3 cup
  3. Greek Yogurt – 1 tbsp.
  4. Almond Butter – 1 tbsp.
  5. Honey – 1/2 tbsp.
  6. Sliced Banana – preference as to how much you add. I usually only put in 1/4 of the banana

Directions:

  • Add the quick oats and milk into the mason jar and give it a quick stir.
  • Measure the Greek yogurt, almond butter and honey and add it to the jar. Stir again.
  • Cut up your banana and add it to the mix. Stir if desired.
  • Seal up the jar and place it in the fridge.

Here’s a quick recipe card to download and print. I call it my Almond Butter Oatmeal Jar….ENJOY!
Almond Butter Oatmeal Jar


Yummy in my tummy.

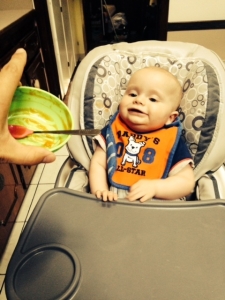
The day has finally come – Liam has started the solid-food stage. And boy did I realize quickly how expensive this stage was going to be. I intended on making Liam his own baby food, but now that it was go-time, I was a little hesitant. What if I don’t make it as smooth as Gerber? What if I don’t cook the raw vegetables enough? How do I compare what I make to equal the ounces of one jar of baby food? Luckily for me, I have a cousin who recently went through the baby food making stage to give me some great pointers. So, here’s what I did.

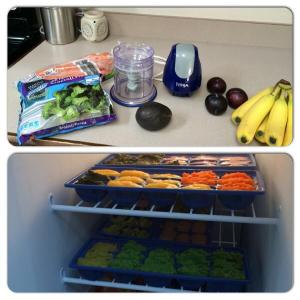
  • I started off with the basics. I knew what kinds of food Liam already liked because we experimented with jar baby food. I bought some plums, bananas, avocado, carrots, pears, broccoli, spinach and peas. For the most part, the items I bought were fresh, but I did buy some frozen and even some canned.
  • When Reed and I said, “I do” four years ago, we received a Ninja Prep as a wedding gift. Up until this new endeavor, it has been the best thing ever and has plowed through every margarita I’ve ever made. Thankfully, it continues to impress!
  • I started off with bananas. I peeled them, sliced them into pieces and piled them into the blender. Then added water and pureed the naners (my word for bananas). I can’t give an exact amount of water for this meal, or for any meals in fact, because it is really preference. I added extra water because Liam was just starting off on solids and I wanted his food to be super creamy. Now that he is a bit older, I don’t add as much water so the food is a bit chunkier. My suggestion here is to just wing it!
  • I continued this process with the other foods. Foods that were in a can, I drained, added them to the blender with water and then pureed it all. Veggies that were fresh (like carrots), I steamed, added water and purred. And any fresh fruit, like the plums I bought, I peeled and did the same thing – added to blender with water and purred. I do suggest being very careful when adding water to fruits since they are naturally juicy anyway.
  • Once every fruit and veggie was sliced and purred, I added them to ice cube trays and let them freeze overnight

homemade baby food

  • When morning came, I popped each cube out from the tray and labeled one baggie per fruit or vegetable.
  • Liam is eating up to four cubes at once now which is around four ounces of food, so at night I just take out four cubes of whatever he will be eating the next day at daycare and put them in a small Tupperware.
  • Some of the foods I have made, Liam refuses to eat – like peas for example. He ate them fine when they were provided by Gerber, but when they were made with love, he refused them. So I started mixing them with fruit – pears, pineapple, applesauce, you name it. Sounds gross but it has been working! Don’t be afraid to make weird concoctions for your little one. It helps them develop a wide array of taste buds.

My advice to new mommys out there with babies starting solid foods –take the time to make your own food and don’t be intimidated! It’s quite easy and you really can’t go wrong. Plus there’s something that makes you feel so good as a mommy when you make your own baby food. It’s actually quite rewarding!

pureed baby food

What you see is what you get.

For a few months now, I have been collecting photos of my crafting projects and filling up Word documents with how they were done. I’ve gone back and forth wanting to start a blog of my own, but it wasn’t until my fellow co-worker, Rachel, started her blog, The Reveler, that I decided it was time.

Generally speaking, just about every week day around 5:00 pm, my husband receives the following text or call, “Are you going to be home on time after work to let the dog out?” This usually means one of two things – I am heading to the gym (I love to run) after work, or I need to run into Pat Catan’s. And by ‘run into Pat Catan’s,’ I mean, spend at least 45 minutes there, along with $50 more than I had originally planned.

I currently work full-time in the advertising industry. When I’m not at work managing clients, I like to craft. To me, the idea of crafting is synonymous with taking on a challenge. Can you turn this ugly piece of furniture into a work of art? Can you string these beads into a pair of earrings for next week’s part? Challenge accepted! And when I am not crafting, I organize. My motto is, “An organized life is a happy life.” I love giving everything a home, even if it means spending $75 on baskets to hold a pile of light bulbs and wash cloths.

Truth be told, I wouldn’t have so much passion if it wasn’t for my encouraging, loving husband of 2+ years. He always thinks the highest of me and loves everything I create. And if by chance he does not love it – he tells me that, too.

While I am starting this blog to share my crafting, organizing and home improvement projects with the World Wide Web, I started finding my zazu for no one other than myself. I wanted a place to keep all of my ideas, visions and creations. All of you reading them is just an added bonus.

So what does finding my zazu mean? Not to be cufused with the bird character from the Lion King, zazu (pronounced za-zoo) is defined as something special, a passion, a feeling like love. Zazu is precisely what is inside me when it comes to organizing, crafting, home improvements, designing, cooking, running, music and now, anything babies thanks to my new baby boy, Liam. The blog name pretty much speaks for itself. By reading this blog you will be witness to me finding my zaza through everything I create.